Article too long to read?
Post-production is the final step that transforms raw footage into a finished short film. It involves editing, sound design, color grading, visual effects, and file delivery. Here’s a quick breakdown of the process:
- Start with Data Management: Organize footage into folders (e.g., "Footage", "Audio") to streamline the workflow.
- Editing Phases: Begin with a rough cut, refine it to a picture lock, and finalize pacing and structure.
- Sound Design: Clean up dialogue, add sound effects, and balance audio for an immersive experience.
- Color Grading: Correct exposure and adjust tones to set the visual mood.
- Visual Effects: Add titles, graphics, or special effects as needed.
- Final Export: Ensure the film meets platform-specific requirements for festivals or streaming.
Using tools like Adobe Premiere Pro, DaVinci Resolve, and Audacity can simplify these steps. Remember to plan your timeline (4-6 weeks is typical), test export settings early, and back up files to avoid setbacks. Whether you’re working solo or with a team, focus on strong editing, clean audio, and consistent visuals for a polished final product.
Short Film Post-Production Workflow | Part 2 | The Film Look
Short Film Post-Production Workflow
A solid post-production workflow keeps your project on track and ensures you hit your deadlines. Each stage builds on the previous one, so understanding how they connect helps you stay organized and efficient.
Main Post-Production Stages
Post-production takes your raw footage and transforms it into a polished final product. Skipping or rushing through the early steps can lead to headaches later, so each stage deserves careful attention.
Data Management and Ingestion is the first step. This involves transferring your footage from memory cards to your editing system. To stay organized, editors typically sort files into folders like "Footage", "Audio", "Graphics", and "Exports."
Assembly Edit comes next. Here, you arrange your clips in the correct sequence to establish the story. This isn’t about perfect timing yet; it’s all about creating a rough structure and picking the best takes.
Rough Cut builds on the assembly edit by tightening timing, cutting unnecessary footage, and shaping the film’s rhythm. This stage is where key creative decisions about pacing and structure are made, so it’s worth dedicating extra time here.
Picture Lock is a major milestone. At this point, all video edits are finalized, and no further changes to timing or clip placement should be made. This allows teams handling sound design, color grading, and visual effects to work without disruptions.
Sound Design and Audio Mixing elevate your audio. This step includes cleaning up dialogue, adding sound effects, balancing levels, and incorporating background music to create a rich soundscape.
Color Grading enhances the visual tone of your film. This involves correcting exposure issues, matching colors between shots, and applying creative looks to support the story.
Visual Effects and Graphics add any computer-generated elements, text overlays, or motion graphics. For short films, this might mean simple compositing or title animations.
Final Mix and Mastering ensures all audio elements are balanced and formatted for different platforms, whether it’s for theaters, online streaming, or broadcast.
Final Export creates the delivery files needed for festivals, streaming platforms, or other outlets. Each platform may have its own technical requirements, so multiple versions are often necessary.
By following these stages, you can keep your workflow smooth and efficient. Let’s dive into some practical strategies to make the process even easier.
Workflow Tips for Independent Filmmakers
Post-production for indie filmmakers often means juggling tight budgets and limited resources. These tips can help you maintain quality while working within those constraints.
- Set a realistic timeline. Most short films need 4-6 weeks for post-production, depending on complexity. Break it down: Weeks 1-2 for the rough cut, Week 3 for picture lock, Week 4 for sound and color, and Weeks 5-6 for final delivery. Always leave room for revisions and unexpected delays.
- Organize your media immediately. Use consistent naming conventions for your files, such as "Scene03_Take02_CloseUp_Sarah." This approach saves hours of searching later. Create a reusable folder structure for future projects.
- Use proxy files to keep editing smooth. Programs like Adobe Premiere Pro or DaVinci Resolve can generate lower-resolution versions of your footage for editing, which is especially helpful if your computer struggles with high-res files.
- Save multiple project versions. Before making major changes, save a new version of your project with clear names like "ShortFilm_v03_RoughCut" or "ShortFilm_v07_PictureLock." This makes it easy to backtrack if needed.
- Plan your storage needs. A short film can easily take up 100-500 GB of space. Use external hard drives and make sure you have at least two copies of critical files to avoid data loss.
- Test export settings early. Create short clips in your final delivery format to catch any technical issues before the full export.
- Consider your computer’s capabilities. If your system struggles with intensive tasks like color grading or effects, plan simpler approaches or rent time at a post-production facility for those specific needs.
- Allow buffer time. Things go wrong – hard drives fail, software crashes, or creative changes arise. Adding 20-30% extra time to your schedule can save you from unnecessary stress.
For independent filmmakers, success in post-production is all about balancing creativity with practical limitations. Nail the essentials – strong editing, clean audio, and consistent visuals – before diving into complex effects or graphics.
Editing Techniques and Software
Editing transforms raw footage into a story that resonates, blending technical expertise with creative intuition. Knowing the right tools and techniques can make this process much smoother and more effective.
Rough Cut to Final Cut Process
Editing unfolds in phases, each with a specific goal. The rough cut is all about shaping the story’s structure and flow, while the final cut sharpens every detail for a polished, seamless experience.
During the rough cut, focus on assembling the best takes to establish your narrative. Timing can be fine-tuned later. Often, scenes that seemed vital during filming may feel unnecessary once you see how everything fits together.
As you move toward the final cut, pacing becomes crucial. For short films, every second matters. Watch your rough cut repeatedly, noting where the story drags or feels rushed. Avoid lingering on shots that look great but don’t push the story forward.
Continuity editing ensures that scenes flow naturally. Pay attention to details like the 180-degree rule, matching eyelines, and consistent lighting. When characters move between shots, their positions and directions should make sense.
The emotional rhythm of your story should guide your edits. Quick cuts can build energy and tension, while longer takes give the audience time to absorb key moments. For instance, a dramatic reveal might benefit from a pause, while an action sequence thrives on rapid cuts.
Transitioning from rough to final cut involves multiple review passes. Start by addressing structural issues, then refine transitions and technical details. Once the cut feels solid, it’s time to choose the right editing software to bring your vision to life.
Best Editing Software Options
The software you choose can significantly impact your editing workflow and creative possibilities. Here’s a look at some top options:
- Adobe Premiere Pro: Known for its ease of use and seamless integration with other Adobe Creative Suite tools like After Effects and Audition. Its proxy workflow lets you handle high-resolution footage on modest systems. The subscription costs $20.99 per month and includes access to Adobe’s full creative suite.
- DaVinci Resolve: Offers professional-grade tools, including industry-leading color correction, for free in its basic version. Its node-based system gives precise control, and the Studio version costs $295 for lifetime access. It’s a favorite for filmmakers needing both editing and advanced color grading.
- Final Cut Pro: A go-to for Mac users, this software costs $299.99 as a one-time purchase. Its magnetic timeline simplifies editing by preventing sync issues when rearranging clips. However, it’s exclusive to Mac systems, which limits accessibility.
- Avid Media Composer: A staple in professional film and TV editing, it’s best suited for complex projects. The subscription starts at $23.99 per month, with a free version available for basic needs. Its powerful media management tools and bin-based organization are ideal for large-scale productions but may be overkill for smaller projects.
For budget-conscious editors, there are excellent free options:
- HitFilm Express: Combines editing and visual effects, though advanced features require paid add-ons.
- Lightworks: Offers professional features in its free version but limits export resolution to 720p.
Even with the best software, editors often encounter challenges that require creative problem-solving.
Common Editing Problems and Solutions
Editing comes with its share of hurdles, especially for those working with limited resources. Here’s how to tackle some of the most common issues:
- Insufficient coverage: Missing reaction shots or establishing shots can disrupt the flow. Get creative with what you have – use cutaways, close-ups, or even repurpose footage from other scenes. Sometimes, layering audio over a reaction shot can bridge gaps.
- Audio sync problems: These can occur when video and audio have mismatched frame rates. Use your editing software’s rate stretch tool to adjust audio speed slightly and fix the issue.
- System performance issues: Large video files can overwhelm personal computers, causing crashes or slow playback. Proxy files can help – store them on a fast drive like an SSD, while keeping original media on larger, slower drives.
- Color and exposure mismatches: Changes in lighting or camera settings can make cuts look jarring. Basic color correction – adjusting exposure, contrast, and white balance – can align shots within a scene.
- Unnatural dialogue cuts: Removing pauses, "ums", or false starts can disrupt the flow of speech. Use J-cuts and L-cuts to smooth transitions. A J-cut starts audio before the video cut, while an L-cut extends audio beyond the video cut.
- Render and export failures: These often strike at the worst times. Test your export settings with short clips before committing to a full render. Keep at least 20% of your hard drive space free, clear your media cache, and close unnecessary programs during rendering.
- Creative block: Watching the same footage repeatedly can make you lose perspective. Take breaks, even for a day, to reset. Share rough cuts with trusted friends for fresh insights. Be ruthless about removing shots that don’t serve the story.
Sound Design and Audio Mixing
Sound design transforms visuals into a complete storytelling experience. While viewers quickly notice bad audio, great sound design often goes unnoticed – it pulls the audience deeper into the story without drawing attention to itself. Like editing or color grading, precise audio work gives your film a polished finish. In fact, the difference between an amateur and professional film often lies in how well the audio complements and strengthens the narrative.
Audio plays a major role in setting the mood – a creaking floorboard can create suspense, while the right musical cue stirs powerful emotions. In short films, where every second counts, thoughtful sound design becomes even more critical.
Core Sound Design Components
Dialogue editing is the backbone of your audio mix. Clean, clear dialogue keeps the audience engaged, while poor audio distracts and breaks immersion. Use noise reduction tools or manual edits to remove background noise, mouth clicks, and breathing sounds.
Room tone is another essential element. Always record 30 to 60 seconds of "silence" on set in each location. This ambient sound bridges gaps between dialogue edits, making transitions feel seamless. For example, when cutting out an "um" or a pause, fill the gap with room tone instead of leaving dead silence.
Sound effects bring your film’s world to life. Foley sounds, like footsteps or door creaks, make scenes feel tangible and real. You don’t need fancy equipment – simple props can replicate these sounds effectively, like using crushed cellophane for fire crackling.
Ambient sound helps establish the setting and mood by adding depth. Layer these sounds at varying volumes – closer sounds should be louder and more detailed, while distant ones can be softer and less defined.
Music selection must align with your film’s emotional rhythm. Avoid overpowering dialogue or clashing with key sound effects. Music should complement the scene, not dictate how the audience should feel. For instance, a soft string arrangement might work better than a bold orchestral piece in an intimate moment.
Timing is crucial when it comes to music. Starting a cue too early can spoil an emotional beat, while starting it too late can miss the moment entirely. Many successful short films use music sparingly, relying on natural sound for most scenes and reserving music for key moments.
Dynamic range is what gives your audio a professional touch. Quiet scenes should remain subtle, while loud moments should hit with impact. Use light compression to even out levels, but don’t overdo it – over-compressed audio can sound flat and lifeless.
With these components in place, the next step is to refine your audio using professional mixing techniques.
Audio Mixing Tools and Methods
Once you’ve nailed the basics of sound design, mixing tools help you refine and balance your audio layers into a cohesive final track. Even on a tight budget, there are effective tools and methods available.
Adobe Audition is a great option if you’re already using Premiere Pro. At $20.99 per month, it integrates seamlessly with Adobe’s ecosystem. Its spectral frequency display allows you to visually identify and remove specific noise frequencies. Adaptive noise reduction tools can clean up background noise while preserving dialogue clarity.
Pro Tools is the industry standard for audio post-production. Starting at $23.99 per month, it offers advanced mixing features and a vast plugin library. While it’s powerful, it might be more than you need for simpler short film projects.
For those on a budget, Audacity is a free option that punches above its weight. Despite its dated interface, it handles basic tasks like noise reduction, equalization, and compression effectively. Its noise profile tool is particularly handy for removing consistent hums or background noise.
Reaper offers professional-grade features for just $60 (personal license). Its flexible routing system and extensive plugin support rival much pricier software. While it has a steeper learning curve, it’s well worth the effort if you’re looking for a cost-effective yet powerful solution.
Most editing software also includes native audio tools for basic mixing. DaVinci Resolve’s Fairlight is a professional-grade audio suite built into the software, while Final Cut Pro and Premiere Pro offer user-friendly tools for straightforward projects.
Plugins can further enhance your mixing capabilities. For example:
- iZotope RX Elements ($129) provides top-notch noise reduction and repair tools.
- FabFilter Pro-Q 3 ($179) offers precise equalization.
- Waves plugins often go on sale for under $50 each, providing affordable options for creative effects.
Your monitoring setup plays a key role in how your mix turns out. Invest in reliable studio monitors or high-quality headphones to ensure your audio translates well across different systems.
When it comes to your mixing workflow, start with the big picture and work toward the finer details. Begin by balancing dialogue levels across scenes. Then, add sound effects and position them in the stereo field to create spatial depth. Finally, layer in music, making sure it ducks under dialogue and key sound effects when necessary.
Export settings depend on your delivery platform. For example:
- YouTube and Vimeo favor stereo mixes with a loudness level of -14 LUFS.
- Film festivals may allow for greater dynamic range.
Always create a master mix at your project’s original sample rate and bit depth, then export platform-specific versions as needed.
Lastly, reference monitoring ensures your mix sounds good on all playback systems. Test it on laptops, phones, car speakers, and earbuds. If dialogue remains clear and music doesn’t overpower other elements across all these setups, your mix is ready for most audiences.
sbb-itb-376fc17
Color Grading and Visual Effects
Color grading and visual effects take raw footage and turn it into a polished, cinematic masterpiece. While these processes might seem complex, modern software has made them accessible to independent filmmakers. The trick lies in knowing when to enhance your footage and when to fix it – and choosing tools that balance features with affordability. This section dives into the steps that can elevate your film’s visual appeal with precise grading and effects.
Color Correction vs. Color Grading
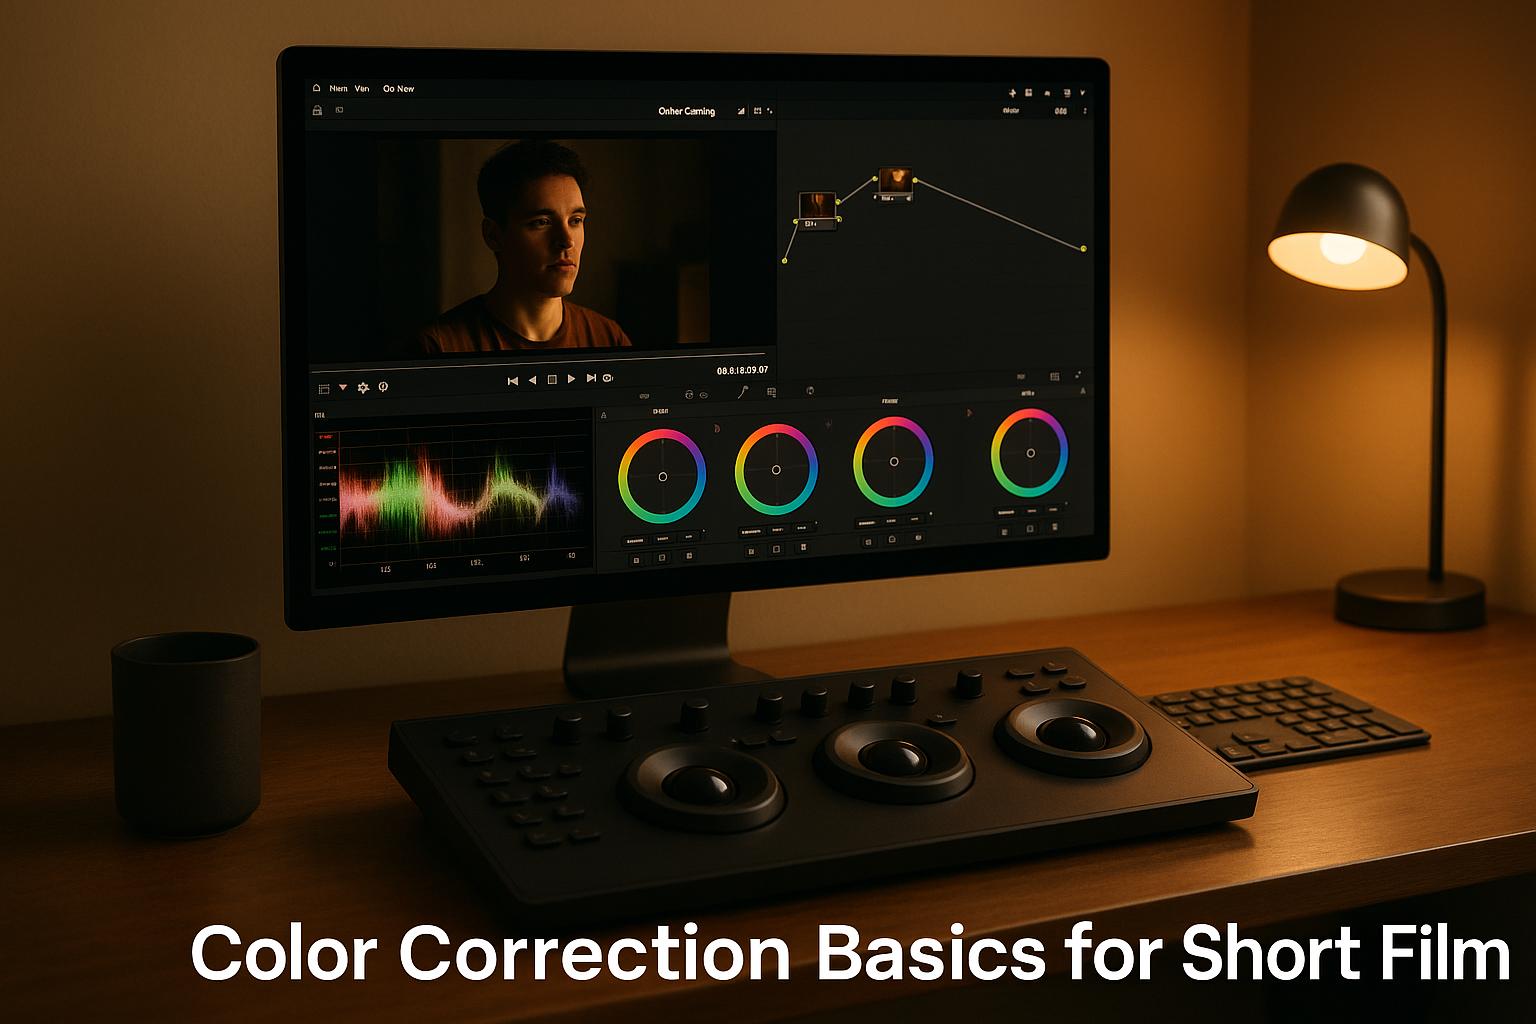
Color correction is the first step, focusing on fixing technical issues like exposure, white balance, and shot consistency. Think of it as laying the groundwork – without proper correction, even the most creative grading won’t shine.
Color grading, on the other hand, is where the magic happens. This step adds mood, supports your story, and brings your unique visual style to life.
One standout tool for both processes is DaVinci Resolve, which offers professional-level features like color wheels, curves, and scopes – all in a free package. Its node-based workflow allows you to layer corrections and grades without degrading the image quality.
Start with primary corrections by using tools like lift, gamma, and gain to balance shadows, midtones, and highlights. Use vectorscopes and waveform monitors to ensure accurate skin tones and exposure.
For secondary corrections, isolate specific colors or areas, such as enhancing the blue in the sky. Tools like hue, saturation, and luminance qualifiers provide precise control. Power windows allow targeted adjustments, and automated tracking makes it easy to follow movement within the frame.
When it comes to creative grading, subtle adjustments across multiple nodes yield the most natural results. While LUTs (Look-Up Tables) can act as a starting point, manual tweaks are often needed to fine-tune the look.
If you’re using Adobe Premiere Pro, the Lumetri Color panel simplifies both correction and grading, while Final Cut Pro offers intuitive color boards and wheels, though they may not match the depth of dedicated tools like Resolve.
Once your footage is graded, the next step is to seamlessly integrate visual effects, which can further enhance your storytelling.
Visual Effects for Short Films
Visual effects (VFX) should always complement the story rather than distract from it. The most effective VFX often go unnoticed, blending seamlessly into the narrative.
Compositing, which combines multiple elements into a single image, is a cornerstone of VFX. Adobe After Effects is a popular choice for this, thanks to its layer-based workflow that handles complex compositing tasks.
For a free alternative, Blender offers powerful compositing nodes alongside 3D capabilities. Its 4.2 LTS version, featuring Eevee Next for real-time cinematic rendering, is particularly appealing for filmmakers working on tight budgets.
Green screen techniques open up endless creative possibilities, from changing locations to creating fantastical scenes. To achieve a clean key, ensure even lighting on both the screen and the subject. Tools like After Effects’ Keylight plugin or DaVinci Resolve’s qualifier tools make keying straightforward, allowing you to refine edges and remove spill.
Motion tracking is another essential VFX tool, enabling you to integrate graphics or objects into live footage seamlessly. After Effects offers robust tracking options, from single-point to planar tracking, while its 2025 Firefly AI feature automates tasks like object removal and background replacement. Similarly, DaVinci Resolve’s Magic Mask uses AI to track faces, people, or objects, simplifying complex projects.
Need to add atmosphere? Particle effects, like those created with After Effects’ CC Particle World, can bring energy and depth to your scenes.
For filmmakers venturing into 3D environments, platforms like Unreal Engine provide free tools for creating immersive worlds, as long as your project earns less than $1 million annually. While advanced techniques like LED wall virtual production might be out of reach, Unreal’s real-time rendering is a game-changer for crafting detailed settings.
Traditional rotoscoping, the painstaking process of isolating elements frame by frame, is now much faster thanks to AI tools like After Effects’ Roto Brush 2.0. Similarly, its Content-Aware Fill feature intelligently removes unwanted elements by analyzing surrounding pixels, saving hours of work.
Finally, ensure your render settings align with your project’s delivery needs. For instance, if your final export is for web platforms, there’s no need to render VFX at a higher resolution – it’ll save time and storage space.
To streamline your workflow, consider software integration. For example, Premiere Pro works seamlessly with After Effects through Dynamic Link, while DaVinci Resolve offers built-in VFX tools that eliminate the need for switching between programs. Proper pre-production planning – like lighting setups, camera movements, and reference markers – can also save time in post-production and make your VFX integration smoother.
Final Review and File Delivery
The final stages of post-production transform your film into a ready-to-distribute product. This phase demands close attention to both technical requirements and creative elements, ensuring your work meets industry standards without compromising its artistic integrity. A careful review at this point not only avoids costly re-submissions but also upholds your professional reputation. This is where all your editing, sound design, and color grading efforts come together.
Final Technical and Creative Review
Technical validation is a critical part of this process. Double-check your timeline’s frame rates and use project management tools to flag any clips that don’t match your sequence settings – stick to 23.976 fps for film-style projects or 29.97 fps for broadcast.
Audio synchronization becomes especially important after making last-minute edits. Confirm that dialogue peaks align with mouth movements and that audio levels stay within the recommended range of -12 dB to -6 dB.
Color consistency is another area to scrutinize. Review your film on multiple monitors to catch any color shifts that might have slipped through during grading, particularly when it comes to maintaining natural skin tones.
Technical specifications should align with your chosen distribution platforms. For example, while 4K resolution (3840×2160) is ideal for future-proofing, many platforms still prioritize 1920×1080 for streaming. Make sure your aspect ratio remains consistent throughout the timeline to avoid issues like black bars or stretched visuals.
Creative consistency involves stepping back from the technical details to watch your film as a whole. Look for pacing issues, narrative gaps, or tonal shifts that could disrupt the viewing experience. Sometimes, edits that seemed perfect in isolation can feel out of place when seen in the broader context of the film.
Once both technical and creative aspects are thoroughly reviewed, you can fine-tune your export settings to meet the specific requirements of your intended platforms.
Export Settings for Different Platforms
Your export settings play a huge role in ensuring your film looks and sounds its best across different platforms.
Codec selection is key. For most distribution needs, H.264 is a solid choice, offering excellent compression and wide compatibility. For higher-quality archival purposes, ProRes 422 provides better color depth and editing flexibility, though it comes with much larger file sizes.
Container formats depend on platform requirements. MP4 is the most universally accepted format, making it a safe choice for streaming platforms, social media, and festival submissions. MOV files, while offering more metadata options, can sometimes run into compatibility issues. When in doubt, stick with MP4.
Bitrate settings determine the balance between file quality and size. For 1080p video, aim for a bitrate between 8-12 Mbps for high-quality web delivery. For 4K content, a range of 25-35 Mbps ensures visual fidelity.
Audio specifications are just as important as video settings. Export audio at 48 kHz, 24-bit for professional submissions or 48 kHz, 16-bit for web platforms. Use stereo audio unless multichannel sound is specifically required.
| Platform Type | Resolution | Frame Rate | Video Codec | Audio Format | Max File Size |
|---|---|---|---|---|---|
| Festival Submission | 1920×1080 or 4K | 23.976 fps | H.264 or ProRes | 48kHz/24-bit | 5-10 GB |
| Web Streaming | 1920×1080 | 23.976 fps | H.264 | 48kHz/16-bit | 2-4 GB |
| Social Media | 1920×1080 | 23.976 fps | H.264 | 48kHz/16-bit | 1-2 GB |
To save time, consider creating custom export presets in your editing software for each platform. This ensures consistency and efficiency across multiple projects.
Festival and Online Platform Delivery
Once your film is exported, focus on the delivery and submission process to ensure everything goes smoothly.
File naming conventions are more important than they might seem. Use clear, descriptive names like "FilmTitle_Director_2025_1080p_H264.mp4" instead of generic ones like "Sequence_01.mp4". This helps festival organizers and platform managers handle your submission professionally.
Upload strategies can save you from missing deadlines. Test upload speeds with smaller files first, especially when dealing with large 4K files that can take hours to transfer. Keep in mind that upload speeds can slow down during peak submission periods, so plan ahead. As a backup, use cloud storage services like Google Drive or Dropbox in case direct uploads fail.
Quality control verification is a must after uploading. Stream or download your file to ensure it matches your original export. Sometimes, compression algorithms used by platforms can introduce visual artifacts or audio sync issues. Catching these problems early gives you time to fix and re-upload if necessary.
Submission package preparation goes beyond the video file itself. Include high-resolution stills (at least 1920×1080) that showcase your film’s visual style. Prepare three versions of your synopsis – 50, 150, and 300 words – to meet different platform requirements. Add a director’s statement to explain your creative vision and production approach.
Metadata optimization can help your film stand out. Use relevant keywords in your film’s description to highlight its genre, themes, and style. If the platform supports it, include closed captions or subtitle files. Not only does this make your film more accessible, but it also shows professionalism.
Backup strategies are essential to avoid technical disasters. Keep multiple versions of your film in different formats and quality levels. Store these across various devices and cloud services to ensure you’re covered if something goes wrong. A submission checklist is also helpful to track materials, deadlines, and platform-specific requirements, reducing last-minute stress.
Finally, tailor your approach to each platform. Research their preferred specifications to optimize your film’s performance. Some platforms prioritize smaller file sizes for faster streaming, while others allow larger files for better quality. Understanding these nuances can make a big difference in how your film is received.
Indie Shorts Mag Post-Production Resources
Once your film is polished and ready, it’s time to refine your skills further and showcase your work. Indie Shorts Mag offers a variety of resources designed to help you navigate the post-production phase and beyond.
Free Tutorials and Guides
Indie Shorts Mag provides a rich library of free tutorials that tackle common post-production challenges. These guides cover a wide range of topics, including:
- Inside the Editing Suite: Best 6 Video Editing Software That Hollywood Movies Use: A detailed comparison of professional editing software to help you find the perfect fit for your budget and project needs.
- Enhancing Scriptwriting: The Role of AI Tools in Crafting Compelling Narrative: A look at how AI tools can refine your story and elevate your narrative during the editing process.
- 10 Websites To Get Royalty Free Music For Short Films & Documentaries [Updated 2025]: A guide to sourcing high-quality, royalty-free audio for your projects.
- How To Make A Simple Poster For Your Short Film in 5 Minutes (Without Photoshop): Step-by-step instructions for creating effective promotional materials using easy-to-access tools.
For an added edge, the platform also offers a Free Film Festival Cover Letter Generator, which automates professional correspondence for festival submissions. These resources not only sharpen your post-production skills but also prepare you for successful festival entries.
Short Film Submission Process
Indie Shorts Mag goes beyond tutorials by simplifying the film submission process. Their Short Film Festival provides an excellent platform to showcase your work, with clear guidelines and a focus on recognizing talent in categories like Best Editing and Best Music.
Filmmakers have praised the submission process for its excellent communication and professional organization. To increase your chances of success, check out the tutorial How to Submit Your Short Film to Festivals and Get Accepted, which shares strategic insights for navigating festival submissions.
Whether you’re learning new techniques or submitting your masterpiece, Indie Shorts Mag offers tools and guidance to support your journey.
Conclusion
Post-production turns raw footage into a refined film that resonates with audiences. From the first cut to the final export, every step requires precision and the right tools. This process is the backbone of any successful short film.
As we’ve discussed, tools like Adobe Premiere Pro and DaVinci Resolve are essential for today’s filmmakers. But it’s not just about the software – it’s about adopting efficient workflows and mastering techniques that bring your vision to life. Editing defines the pacing and flow of your story, sound design adds emotional layers that visuals alone can’t achieve, color grading creates mood and visual harmony, and even simple visual effects can significantly enhance production quality. With technology advancing rapidly, post-production has become more streamlined than ever. For instance, in December 2024, Indie Shorts Mag highlighted how AI tools are simplifying workflows and enhancing storytelling.
Indie Shorts Mag also provides invaluable resources, from insights on editing software to access to royalty-free music libraries, helping filmmakers optimize their process and improve their final product. These tools and techniques not only summarize the post-production journey but can also inspire you to elevate your filmmaking. Dive into these strategies and resources to take your post-production skills to the next level.
FAQs
What are the most common mistakes to avoid in short film post-production?
Some frequent missteps in short film post-production include rushing through the editing process, which often results in missed details, and ignoring sound design, a key element for creating a truly immersive experience. Skipping color grading or underestimating the value of visual effects can also detract from the film’s overall impact.
Another common mistake is failing to properly back up your footage, which can lead to disastrous losses if technical issues arise. To steer clear of these problems, dedicate enough time to planning, work carefully through each step, and give equal attention to both audio and visual elements to deliver a polished final product.
What are the best ways to manage time and resources during post-production for an independent short film?
To make the most of your time and resources during post-production, start by putting together a thorough schedule. Map out key tasks like editing, sound design, and color grading, and don’t forget to include some buffer time for any unexpected hiccups. This way, you can keep everything running smoothly.
Leverage project management tools to track progress and allocate resources effectively. These tools can help you stay on budget and meet deadlines for each phase of the process. Regularly review your schedule to spot and address any bottlenecks before they become bigger problems.
Good communication with your team is just as important. Keep everyone on the same page about goals and timelines to avoid unnecessary mistakes. By planning ahead and providing regular updates, you can streamline the entire process, saving both time and effort.
What’s the difference between color correction and color grading, and how do they shape the final look of a short film?
Color correction is all about fixing technical hiccups like white balance, exposure, and color consistency to make your footage look natural and visually uniform. It’s the groundwork that ensures every shot flows seamlessly together.
Color grading, however, is where the creativity kicks in. This step lets you shape the mood, tone, and overall style of your film. Maybe you’ll add warm tones to evoke nostalgia or lean into cooler shades to stir up a sense of tension or mystery.
When combined, these two steps can completely transform your footage – color correction lays the solid visual base, while color grading adds the artistic flair that brings your vision to life.
Related Blog Posts

About the Author

Related Posts


No comments yet.
Got Something to add to this article?
Your email address will not be published. Required fields are marked *