Article too long to read?
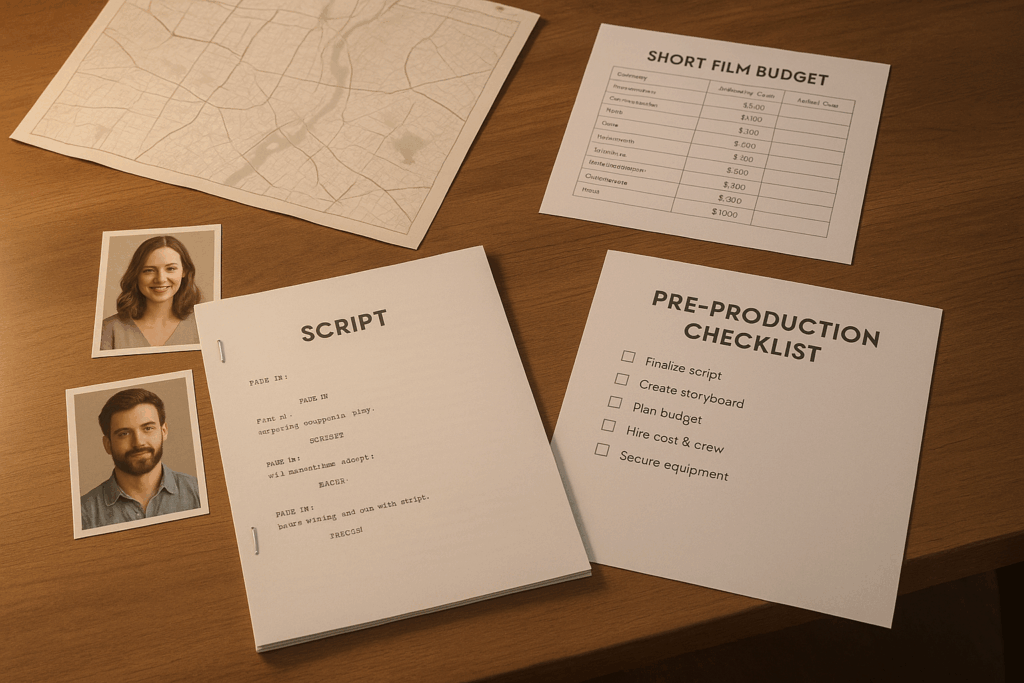
Pre-production is the backbone of any short film. It involves planning every detail to avoid costly mistakes and ensure a smooth shoot. Here’s a quick breakdown of what you need to prepare:
- Script: Lock the final version, check for continuity, and break it down into production elements like props, locations, and technical needs.
- Budget: Outline all costs, including cast, crew, equipment, locations, and post-production. Always include a contingency fund for unexpected expenses.
- Casting and Crew: Conduct auditions with clear character breakdowns and hire key crew members like the director of photography and sound engineer.
- Locations: Scout suitable locations, secure permits, and assess logistics like parking, power access, and noise levels.
- Schedule: Plan shooting days efficiently by grouping scenes by location and adding buffer time for transitions.
- Communication: Use call sheets, stripboards, and dedicated tools to keep everyone informed and organized.
Pre-Production Workshop︱The Ultimate Guide to Prepping Your Short Film
Script Review and Breakdown
Your script is the backbone of your project, guiding every step of pre-production. Without a finalized, polished script, production can quickly become chaotic, with constant revisions and unclear direction slowing everything down.
Completing the Script
Finalize your script before moving forward. Once the script is "locked", it means you’re committing to this version for production, even if it’s not flawless. Making changes after this point can cause delays and drive up costs.
Start by doing a continuity check. Read through the script multiple times, paying close attention to character details, timeline consistency, plot gaps, weather conditions, and wardrobe across scenes. Small inconsistencies can snowball into major issues during production.
Next, evaluate the feasibility of each scene. Does your vision fit within your budget and timeline? For instance, a dramatic car chase might look incredible on paper, but if you’re working with limited resources, you may need to simplify or rethink it. Look for creative ways to achieve the same emotional impact while staying within your means.
Proofreading is essential. Check for grammar, spelling, and formatting errors. Using industry-standard formatting isn’t just about professionalism – it ensures your script is easy to read and interpret, and it helps with timing estimates (typically, one page equals about one minute of screen time).
Once your script is locked, it’s time to break it down into actionable steps for production.
Breaking Down the Script
Breaking down the script means turning your vision into a detailed production plan. This process involves going through each scene systematically and identifying everything you’ll need to bring it to life.
- Categorize production elements: Highlight or tag items like cast, props, costumes, makeup, special effects, vehicles, animals, and sound effects. Use different colors or digital tags for each category to keep things organized.
- Detail location needs: Go beyond general descriptions. For example, instead of just "coffee shop", specify whether you need a functional kitchen, outdoor seating, or specific lighting setups. Include time-of-day requirements and practical considerations like parking for the crew.
- Plan for cast requirements: Don’t just think about speaking roles. Include background actors, body doubles, or hand models. Note any special skills needed, like playing an instrument, driving stick shift, or performing stunts.
- List technical needs: Identify scenes requiring complex lighting setups, multiple camera angles, or challenging sound requirements. Include any special equipment, like cranes, dollies, or underwater gear.
- Estimate scene complexity: This helps with scheduling. A simple conversation between two actors in one location will take far less time to shoot than an action scene with multiple moving parts.
This meticulous process ensures nothing gets overlooked. To make it even smoother, consider using digital tools.
Using Tools for Script Breakdown
Digital tools can simplify and speed up the breakdown process. Software like StudioBinder, Celtx, or Movie Magic Scheduling allows you to tag elements in your script and automatically generates breakdown sheets. If you’re on a tight budget, spreadsheets can work just as well.
- Breakdown sheets: Organize these by shooting day rather than script order, as scenes are often filmed out of sequence to maximize efficiency.
- Department-specific breakdowns: Tailor lists for each crew member. For instance, your costume designer will need a breakdown of wardrobe requirements by character and scene, while the prop master will need a detailed list of props, including backups.
- Spreadsheets as an alternative: If specialized software isn’t an option, create tabs for different categories like cast, props, locations, and equipment. Cross-reference scene numbers and include columns for item status, backups, and assigned crew members.
- Plan for contingencies: Always prepare backup options. Have alternative props, secondary locations, or simplified versions of complex scenes ready to go. This way, if an actor is unavailable or weather disrupts your plans, you can adapt without losing valuable time.
A thorough script breakdown is more than just a checklist – it’s the foundation for accurate budgets, realistic schedules, and organized crew assignments. Taking the time to get it right now will save you from costly surprises during production.
Budget Planning and Resource Management
When it comes to short film projects, creating a well-thought-out budget can make or break your production before the cameras even start rolling. Without a financial plan, costs can spiral out of control, forcing you to either scramble for additional funds or compromise your creative vision. Let’s dive into how to build a thorough budget and manage resources effectively.
Building a Complete Budget
A solid budget acts as the foundation for every pre-production decision, from hiring talent to scouting locations. Start with an overall expense plan and then break it down into detailed categories. Make sure to include every possible cost, from large-ticket items like equipment rentals to smaller, easily overlooked expenses like parking fees or craft services.
Divide your budget into core categories to reflect how money will flow during production. Here’s how to structure it:
- Above-the-line costs: These include key creative roles like the director, producer, and lead actors.
- Below-the-line expenses: This category covers everything else – crew wages, equipment, locations, post-production, and miscellaneous costs.
Don’t forget to include the following specifics:
- Cast and crew day rates, overtime, meal penalties, payroll taxes, and workers’ compensation.
- Discounts for multi-day equipment rentals – ask vendors about these options.
- Location fees, parking permits, security deposits, and coverage for potential damages.
- Post-production expenses like editing software, color correction, sound mixing, and music licensing, depending on your film’s complexity and quality goals.
It’s also wise to set aside a contingency fund for unexpected costs, such as equipment failures, weather delays, or last-minute changes. This financial cushion can help you avoid disruptions and keep your production on track.
Tracking Expenses
Keeping a close eye on your expenses throughout production is just as important as creating the budget itself. Start tracking from day one and stay consistent.
- Use a dedicated tracking system – this could be a simple spreadsheet or a specialized budgeting tool. Organize expenses into categories and update them regularly.
- Assign a financial tracker if you’re juggling multiple roles. This person can collect receipts, approve purchases, and flag potential budget issues early.
- Set a rule requiring approval for any unbudgeted expenses that exceed a specific threshold. This helps prevent small, unplanned costs from snowballing.
- Keep digital copies of all receipts, sorted by date and vendor. This will save you time during tax preparation or when reporting to investors.
With your expenses under control, you can focus on making the best use of your resources.
Allocating Resources Efficiently
Spending wisely is all about prioritizing the elements that will have the biggest impact on your final film. For example, while catering might not make it to the screen, high-quality audio and lighting will directly affect how your audience experiences the film.
- Negotiate with vendors to stay within your budget. Many service providers are open to discussing cost-saving options, especially if you maintain a professional relationship.
- Consider bartering services or credits to cut costs, but make sure the agreement benefits both parties clearly.
- Prepare for hidden expenses like sales tax, transportation, and parking fees.
- Build connections with local film communities. Many cities have filmmaker cooperatives that offer shared resources, bulk discounts, or group insurance policies, which can significantly reduce costs.
Finally, keep track of your spending patterns during production. Understanding which categories tend to exceed estimates or come in under budget can help you plan more effectively for future projects and avoid repeating costly mistakes.
Casting and Crew Selection
The choices you make during casting and crew selection can shape the success of your production. This process requires thoughtful planning, clear communication, and professional agreements to ensure everything runs smoothly. Every decision you make here directly affects the creative quality and overall efficiency of your project.
Conducting Casting Calls
Start by creating detailed character breakdowns that outline age, physical traits, and personality. Share these on platforms like Backstage, Casting Networks, or even local Facebook groups for actors. Be clear about your project timeline, compensation (even if it’s just copy and credit), and what actors need to prepare for auditions.
When scheduling auditions, allot 10–15 minutes per actor and standardize the process by having everyone read the same scenes. This consistency makes it easier to compare performances later. Use a casting sheet to track essential details like contact information, availability, performance notes, and callback decisions. If possible, record auditions (with the actor’s permission) for future reference, and explain how the footage will be used.
Prepare talent release forms ahead of time and have actors sign them before auditions. These forms grant you permission to use their likeness in your project and outline the terms of their participation. Having these ready not only saves time but also keeps the process professional.
Once your cast is finalized, you can shift your focus to building a capable and efficient crew.
Building Your Crew
When assembling your crew, prioritize roles that will directly impact the technical quality of your film. Key positions to fill first include the director of photography, sound engineer, and script supervisor – these roles are critical for ensuring strong visuals, clear audio, and on-set organization.
Evaluate potential crew members by reviewing their past work and asking for references from recent projects. For example, a cinematographer’s reel can reveal their skills in lighting and camera movement, while a sound engineer’s portfolio can showcase their ability to capture crisp dialogue and ambient sound. Beyond technical expertise, consider how well they collaborate with others.
Networking within local film communities can often yield better results than online job boards. Attend film screenings, workshops, or meetups to connect with professionals in person. Many experienced crew members prefer working with people they’ve met face-to-face, and these interactions can lead to valuable referrals for other positions.
If you’re working with a tight budget, consider offering meaningful credits or portfolio materials as compensation. Emerging professionals are often willing to accept reduced rates in exchange for strong reel content or opportunities to take on greater responsibilities than they might get on larger productions.
Using Professional Agreements
Clear agreements are essential for setting expectations and protecting everyone involved. Just as you plan your script breakdowns and budget, precise contracts help avoid delays and disputes during production.
For crew members, agreements should detail roles, compensation, schedules, meal breaks, credits, overtime policies, equipment responsibilities, and contingency plans for potential delays. For cast members, actor agreements should cover usage rights, payment terms, wardrobe requirements, and any special provisions for stunts or intimate scenes. Be sure to specify whether actors are responsible for their own transportation and how long they’ll be expected on set each day.
Location releases are equally crucial when filming on private property or in businesses. These documents grant you permission to film on-site and include details about crew size, equipment, and any potential disruptions to normal operations.
Keep signed copies of all agreements organized and easily accessible throughout the production. Assign someone on your team to handle this documentation to avoid any last-minute issues. Properly documented agreements not only prevent misunderstandings but also provide legal protection if problems arise during or after filming.
Finally, outline payment schedules clearly in writing. Many short film productions pay crew members at the end of the shoot, but if you’re paying in installments, specify exact dates and amounts to avoid confusion. Having everything in writing ensures transparency and keeps everyone on the same page.
sbb-itb-376fc17
Location Scouting and Permits
When it comes to pre-production, location scouting is where creativity meets practicality. The right location can enhance your story, while a poor choice can derail your budget and complicate production. Once your cast and crew are locked in, it’s time to find locations that not only fit your script but also meet all technical and legal requirements.
Finding the Right Locations
Look for locations that match the tone and visual style of your project. Evaluate how the background elements contribute to the narrative and how much effort will be needed to adapt the space. Take clear photos and videos of each spot, and use online tools like maps to gather details before visiting in person.
Practical considerations are just as important as aesthetics. Space and logistics should be top of mind – ensure there’s enough room for your crew, equipment, and on-set operations. Plan for parking and check local regulations to avoid surprises.
Power and infrastructure are critical, too. Confirm access to properly grounded outlets and sufficient breaker capacity with your electrical team. Check for bathroom availability – aim for at least one restroom per 15 people – and locate water, gas, and plumbing shutoffs for emergencies.
Sound is another key factor. Test for background noise from traffic, HVAC systems, or other disruptions at different times of the day. If necessary, plan for soundproofing materials to handle reverberation or other issues.
Weather can also throw a wrench in your plans. Be ready for unexpected rain, wind, or lighting changes, and consider microclimate variations that could impact your shoot. Always have at least three backup options in case your primary location falls through.
Once you’ve narrowed down potential locations, the next step is securing the necessary permits and approvals.
Getting Permits and Approvals
For most commercial shoots, permits are a must – even for student films or monetized YouTube videos. The process varies depending on whether you’re filming on city, state, or federal property, so identifying the correct film office early is crucial.
If you’re working in Los Angeles, FilmLA handles most permits. For federal lands, you’ll need to coordinate with agencies like the Bureau of Land Management (BLM) or the National Park Service (NPS). Each jurisdiction has unique requirements and timelines, so plan accordingly.
Your permit application should include details like project type, title, exact locations, dates, times, crew size, vehicles, and any special equipment (e.g., cranes, generators, or pyrotechnics). Processing times usually range from 5 to 14 business days. Expedited options are available but come at an additional cost and aren’t always guaranteed.
Insurance is non-negotiable. You’ll need liability insurance and Workers’ Compensation coverage. For federal properties, make sure to list the United States as an additional insured party on your policy.
Community notification is another common requirement. Typically, you’ll need to notify nearby residents and businesses 72–96 hours before filming. Provide them with an official "Notice of Filming" that outlines your activities and includes contact information for questions or concerns.
Once permits are in motion, it’s time to consolidate your scouting efforts with a detailed checklist.
Using Checklists for Scouting
A well-organized checklist can save you from costly mistakes. It ensures you gather all the necessary information during your visits, covering everything from technical specs to safety and budget considerations.
Your checklist should include:
- Technical details: Power availability, internet access, and load-in logistics.
- Safety measures: Emergency exits, potential hazards, and first aid access.
- Cost factors: Fees, deposits, and overtime policies.
To streamline decision-making, use a standardized rating system to score each location on elements like visual appeal, logistical ease, cost, and permit complexity. Keep detailed notes on the pros and cons of each option. This way, you’ll have all the information you need when it’s time to finalize your choices or prepare for the actual shoot.
Scheduling and Production Planning
Once you’ve secured your locations and permits, the next step is turning your pre-production plans into a realistic and efficient schedule. A solid production schedule is the backbone of any successful shoot, helping you balance creative goals with logistical realities while keeping everyone on the same page. This phase requires careful planning to align key dates, resources, and practical needs.
Creating a Production Schedule
The first step is identifying your non-negotiable dates and constraints. These might include actor availability, location access windows, or equipment rental periods. These fixed elements will serve as the foundation for your schedule.
To save time and money, group scenes by location. For example, if you’re filming three scenes at a coffee shop and two at a park, plan to shoot all the coffee shop scenes together before moving to the park. This approach minimizes travel time and reduces location costs, especially if venues charge daily rates.
Another factor to consider is the emotional arc of your actors. Avoid scheduling back-to-back intense scenes that might leave your cast drained. Starting with lighter material can help the team ease into the day. For instance, if a pivotal breakup scene is part of your film, it’s probably not ideal to tackle it first thing on a Monday morning.
For outdoor shoots, account for weather contingencies. Always have indoor backup scenes ready to go and check historical weather patterns for your shooting dates. If you’re filming in a city like Chicago in April, you’ll want to be prepared for rain and plan accordingly.
Don’t forget to include buffer time between setups. A common mistake is scheduling transitions too tightly, which can lead to chaos if delays occur. Add 30-minute buffers for location changes and 15 minutes for set adjustments to keep things running smoothly.
Using Call Sheets and Stripboards
Call sheets are essential for daily communication. Send them out 24 hours in advance with clear schedules, and include all critical details like call times, contact information, location addresses with parking instructions, weather forecasts, and meal plans. A brief scene summary can also help the cast and crew mentally prepare for the day.
Be sure to format call sheets clearly, using a 12-hour clock for times. For remote locations, include driving directions and GPS coordinates, as cell service may be unreliable.
Stripboards provide a visual overview of your entire production. Each scene is represented by a colored strip that includes information like the day, time, location, cast, and crew requirements. Digital stripboards make it easy to rearrange scenes when changes inevitably arise.
Color-coding your stripboards can highlight inefficiencies. For instance, you might notice that scenes involving "Actor A only" are scattered across multiple days, creating unnecessary makeup and costume costs. Grouping these scenes together can streamline your production and save resources.
Emergency contact information should be easy to find on every call sheet. Include the first assistant director’s phone number, the production office number, and the nearest hospital address. For remote shoots, identify the closest urgent care facility and ensure someone has a well-stocked first aid kit.
Managing Communication
Establishing clear communication protocols is critical. Designate one person – typically the first assistant director – as the go-to contact for all schedule updates and changes.
To keep things organized, create separate messaging groups for each department. For example, the makeup team doesn’t need to be looped into discussions about camera equipment, but they do need updates on cast call times. This targeted communication reduces unnecessary noise and ensures everyone gets the information they need.
A production hotline or dedicated phone number can be a lifesaver for urgent updates. This ensures critical messages don’t get lost in personal text threads and guarantees someone is always available to address questions or concerns.
Daily wrap reports are another simple but effective tool. After each shooting day, send a quick email summarizing what was accomplished, any changes to the schedule, and reminders for the next day. This keeps everyone informed and reinforces your professionalism.
For last-minute changes, have a clear chain of communication in place. If an actor reports sick at 6:00 AM, who gets notified first? How quickly can you pivot to a backup plan? Having these processes established in advance ensures that even unexpected challenges won’t derail your production.
Tools, Templates, and Resources
Having the right tools and templates can simplify pre-production, ensuring that everything aligns with your budget and skill level.
Key Templates
Templates can help you organize and standardize your workflow during pre-production.
- Script breakdown sheets: These should detail essential elements like cast, props, wardrobe, special effects, and locations. Using a color-coded system (e.g., red for props, blue for wardrobe, green for effects) makes it easier to quickly identify items during production planning.
- Budget templates: For short films, these templates should include line items like equipment rentals, location fees, catering, transportation, and post-production costs. Look for templates that separate above-the-line costs (such as talent, director, and producer fees) from below-the-line expenses (crew, equipment, materials) and include a contingency buffer of 10–15% of the total budget.
- Call sheet templates: These should follow the format of traditional production call sheets, with clear typography and a logical layout. Adding a section for special notes can be helpful for unique production needs.
- Location release forms and talent agreements: These documents should outline key details, including filming dates, compensation, usage rights, payment terms, image rights, and credit agreements.
- Risk assessment templates: These are essential for identifying and addressing potential safety issues. They should cover equipment safety, location-specific risks, weather-related challenges, and emergency protocols. Include sections for identifying the nearest hospital, assigning a safety officer, and detailing procedures for emergencies.
Helpful Tools
- StudioBinder: A comprehensive tool that helps with script breakdowns, shot lists, and call sheet creation. It also automates updates and sends reminders.
- Movie Magic Budgeting: This professional budgeting software is widely used in the industry. Although it has a learning curve, it offers templates for various production types and tracks actual expenses against projections, helping you identify cost-saving opportunities.
- Google Sheets or Excel: For simpler budgeting needs, these tools offer customizable templates, real-time collaboration, and automatic calculations.
- Calendly: This scheduling tool simplifies the casting process by allowing actors to book their own audition slots, cutting down on back-and-forth emails. You can create appointment types for different roles and include pre-audition questionnaires.
- Slack or Discord: Both platforms enhance communication by allowing you to create separate channels for departments like camera, sound, and art. They also support file sharing and integrate with calendar apps, making them great for team collaboration.
- Weather apps: Tools like Weather Underground provide detailed forecasts and historical data, which can help you plan outdoor shoots and prepare backup indoor scenes. Some apps even offer hour-by-hour forecasts up to 10 days in advance.
These tools can seamlessly integrate into your production plan, saving you time and effort.
Indie Shorts Mag Resources
Indie Shorts Mag offers a treasure trove of resources tailored for independent filmmakers working with small crews and tight budgets. Their step-by-step guides cover essential tasks like script breakdowns, budget planning, and crew management.
The platform’s Hall of Fame section highlights successful short films, offering inspiration and practical examples of how filmmakers have navigated pre-production challenges on limited budgets.
For filmmakers looking to submit their work, Indie Shorts Mag provides submission opportunities along with feedback and exposure. They also guide you through meeting industry standards for both technical quality and storytelling.
One standout feature is their free film festival cover letter generator, which helps craft professional submissions for film festivals. A well-written cover letter can make a big impact, particularly at smaller festivals where a personal touch matters. The generator offers templates tailored to various festival types and submission categories.
For visual learners, Indie Shorts Mag TV provides step-by-step video tutorials, making complex tasks easier to grasp. These resources are invaluable for independent filmmakers looking to elevate their projects without breaking the bank.
Conclusion: Completing Your Pre-Production Checklist
Once you’ve addressed all aspects of pre-production, it’s time to wrap up with a few essential checkpoints. A well-thought-out pre-production plan is the backbone of a safe, efficient, and budget-conscious shoot. The difference between a smooth production day and a chaotic mess often lies in the groundwork laid weeks in advance.
Here are the key items to finalize before moving into production:
- Script lock and a detailed breakdown
- A budget that includes contingency funds and expense tracking
- Signed agreements and location releases
- Scouted locations with all necessary permits secured
- A realistic production schedule
- Centralized communication systems for the team
For instance, imagine you’re shooting a 10-page script across two locations. You could streamline the process by filming 5 pages in a controlled indoor environment on Day 1 and finishing the outdoor scenes on Day 2 after confirming all logistics. With signed releases and a 12% contingency built into the budget for unexpected costs, you minimize risks like overtime expenses and ensure the production stays on track.
On Day 1, every department should be working from the latest call sheet. Agreements should be finalized, permits secured, and contingency plans ready to go. This level of preparation dramatically reduces the chances of on-set delays.
A final approval process for major components is crucial. Ensure the script, breakdown, and schedule are reviewed and distributed. Double-check that the budget, including contingency funds, is approved and that tracking systems are operational. Document findings from your tech scout, including details about access, parking, power availability, and sound concerns. Share the finalized stripboard and shooting schedule with department heads, and make sure call sheets are sent out by 6:00 PM the night before each shoot day.
By consolidating all these elements, you transform meticulous planning into actionable readiness. To make this easier, download and customize essential templates such as script breakdown sheets, budget templates, stripboard schedules, call sheets, talent and location release forms, and risk assessment documents. These tools are your pre-production safety net, keeping every department aligned and on the same page.
"Planning isn’t just about filling out forms – it’s about turning creative vision into a safe, on-time, and on-budget production. Checklists, templates, and tech scouts exist to make that process repeatable."
The templates and resources used by professional productions are just as valuable for independent filmmakers. Investing in detailed pre-production pays off the moment you call "action" on Day 1. Completing this checklist ensures you’re fully prepared for a smooth transition into production.
FAQs
What are the best digital tools for breaking down scripts and planning production schedules for short films?
When it comes to breaking down scripts, tools like Final Draft (with its Tagger feature) and Filmustage (which uses AI for scene analysis) are popular choices. They simplify the process by automatically identifying key elements in your script, such as props, locations, and characters, saving you time and effort.
For production scheduling, platforms like StudioBinder, Gorilla Scheduling, and Movie Magic Scheduling are go-to options. These tools offer user-friendly interfaces and automation features to handle tasks like creating shooting schedules, tracking crew availability, and managing production timelines. They’re especially useful for the specific challenges of short film pre-production.
How can filmmakers create a realistic budget and avoid unexpected expenses during short film production?
When putting together a budget for a film, it’s smart to include a contingency fund – typically around 5–15% of your total budget. This acts as a financial safety net for unexpected expenses, like fixing broken equipment, handling last-minute location changes, or covering the cost of extra shooting days.
Another helpful approach is to plan your budget in phases. Break it down into categories like pre-production, production, and post-production. Carefully review each section to ensure you’ve accounted for all possible expenses. Staying organized and thinking ahead will make it easier to manage your budget and keep your project running smoothly.
How do I secure filming locations and permits for my short film?
To arrange filming locations and permits in the U.S., the first step is figuring out whether the location is public or private. For public areas like parks or city streets, you’ll need to contact the local film commission or the relevant government office as early as possible. These permits often require an application, proof of insurance, and payment of fees. Keep in mind that some public locations may need months of advance notice to secure approval.
If you’re planning to film on private property, written permission from the property owner is a must. Shoots involving commercial activities, special effects, or road closures might also require additional permits or approvals. Starting this process during pre-production gives you enough time to handle potential delays or meet unique requirements. Careful preparation helps keep your production running smoothly and on schedule.
Related Blog Posts


About the Author

Related Posts


No comments yet.
Got Something to add to this article?
Your email address will not be published. Required fields are marked *